
May 6, 2026
5 Ways to Create App Store Screenshots Fast (Without Hiring a Designer)
App Store screenshots are the single highest-leverage marketing asset you control. They appear before your description. Before your reviews. Before anyone has decided whether your app is worth their time.
Most solo developers treat them as an afterthought — made once, never updated, visibly rushed. A simulator export dropped onto a white background. No context, no framing, no reason to tap. And then they wonder why conversion is flat.
The problem isn't your app. It's that creating polished screenshots feels like it requires design skills you don't have, or a freelancer budget you'd rather spend elsewhere. Neither is true. This post covers five practical methods for creating App Store screenshots fast — ranked from "free and basic" to "fastest path to premium quality."
Why App Store screenshots matter more than most developers think
Before getting into the methods, a quick case for why this is worth your time.
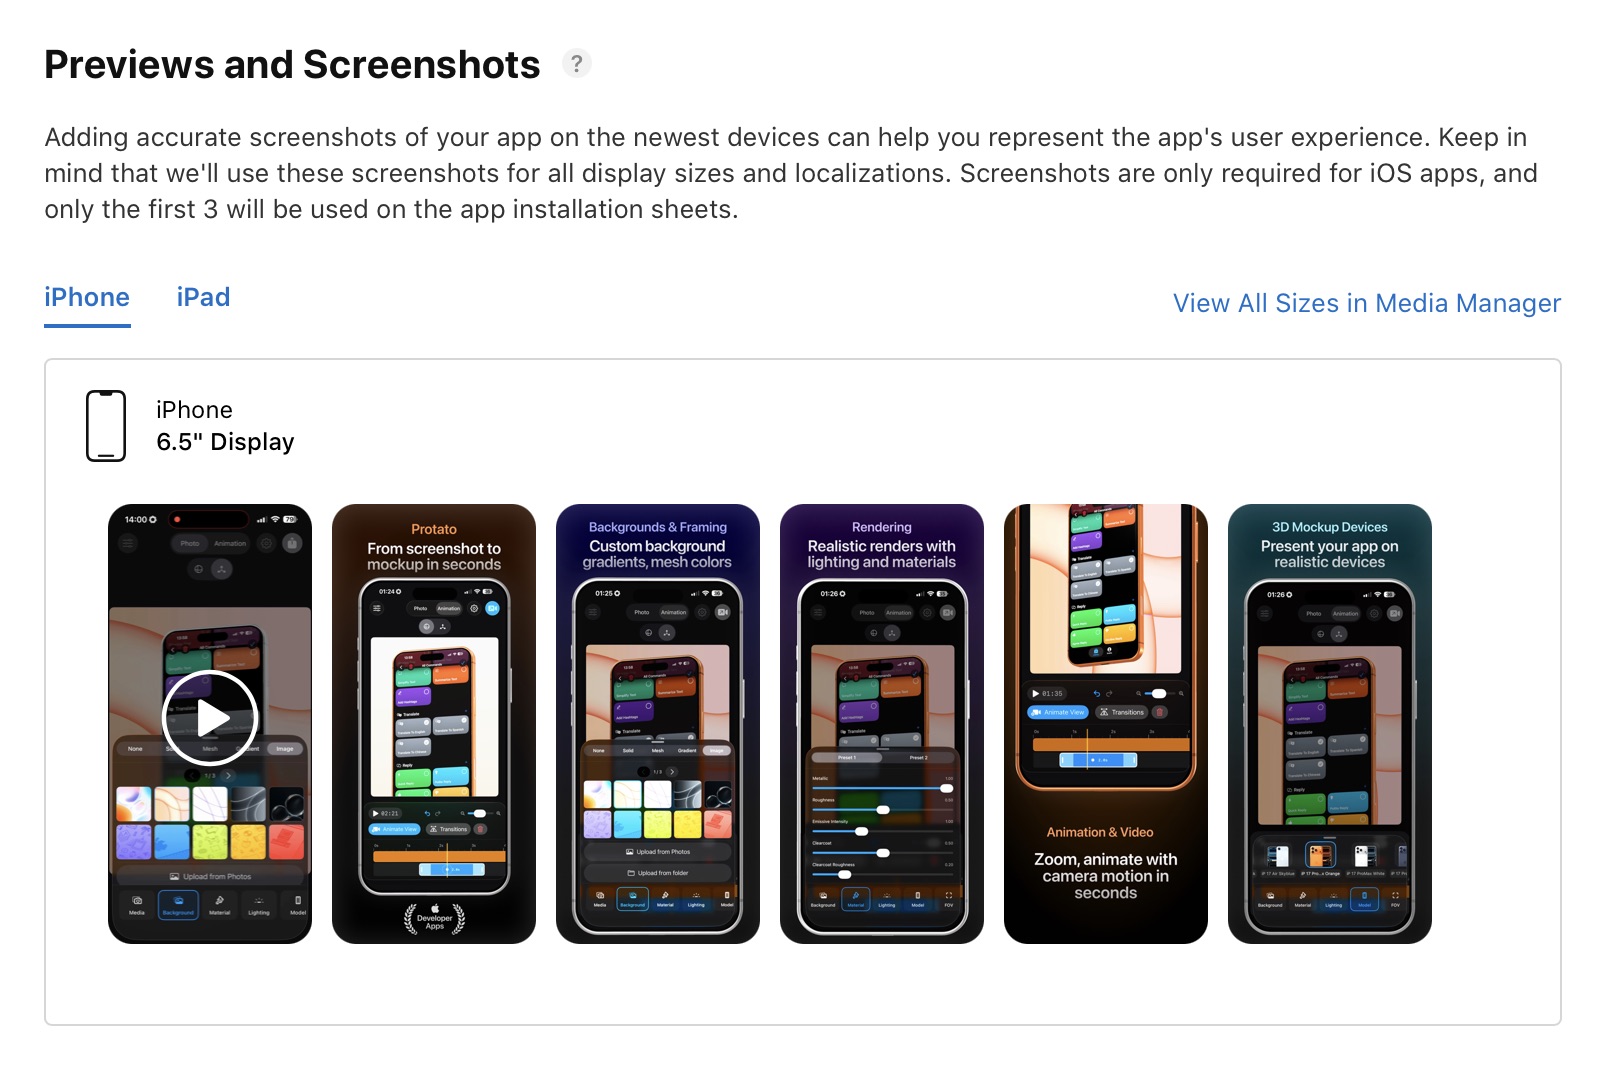
Apple gives you up to ten screenshot slots. Most developers use three or four, and most of those are plain simulator exports with small caption text overlaid in a free tool. The result looks like every other app in the category — which means it looks forgettable.
High-quality screenshots — with realistic device framing, thoughtful lighting, and clear visual hierarchy — signal that the app is polished before anyone has tapped a single button. For an indie developer competing against apps with dedicated design teams, this is one of the few places where a few hours of effort can close a significant gap.
Getting this right doesn't require a designer. It requires the right method for your skill level and timeline.
Method 1: Plain simulator screenshots (free, fast, forgettable)
This is where most developers start. Run the app in Xcode Simulator, take screenshots at the required sizes, upload to App Store Connect. Done in 20 minutes.
The output is technically compliant — Apple accepts it — but it's the weakest presentation you can offer. There's no device frame, no context for what the app does, no visual hierarchy. It's a raw screen dump. For an early beta or a utility app with a niche audience that already knows what they're looking for, this can be acceptable. For anything consumer-facing, it's leaving conversion on the table.
Best when: You're in early access, testing the listing, or building a tool where the screenshot content is self-explanatory to your specific audience.

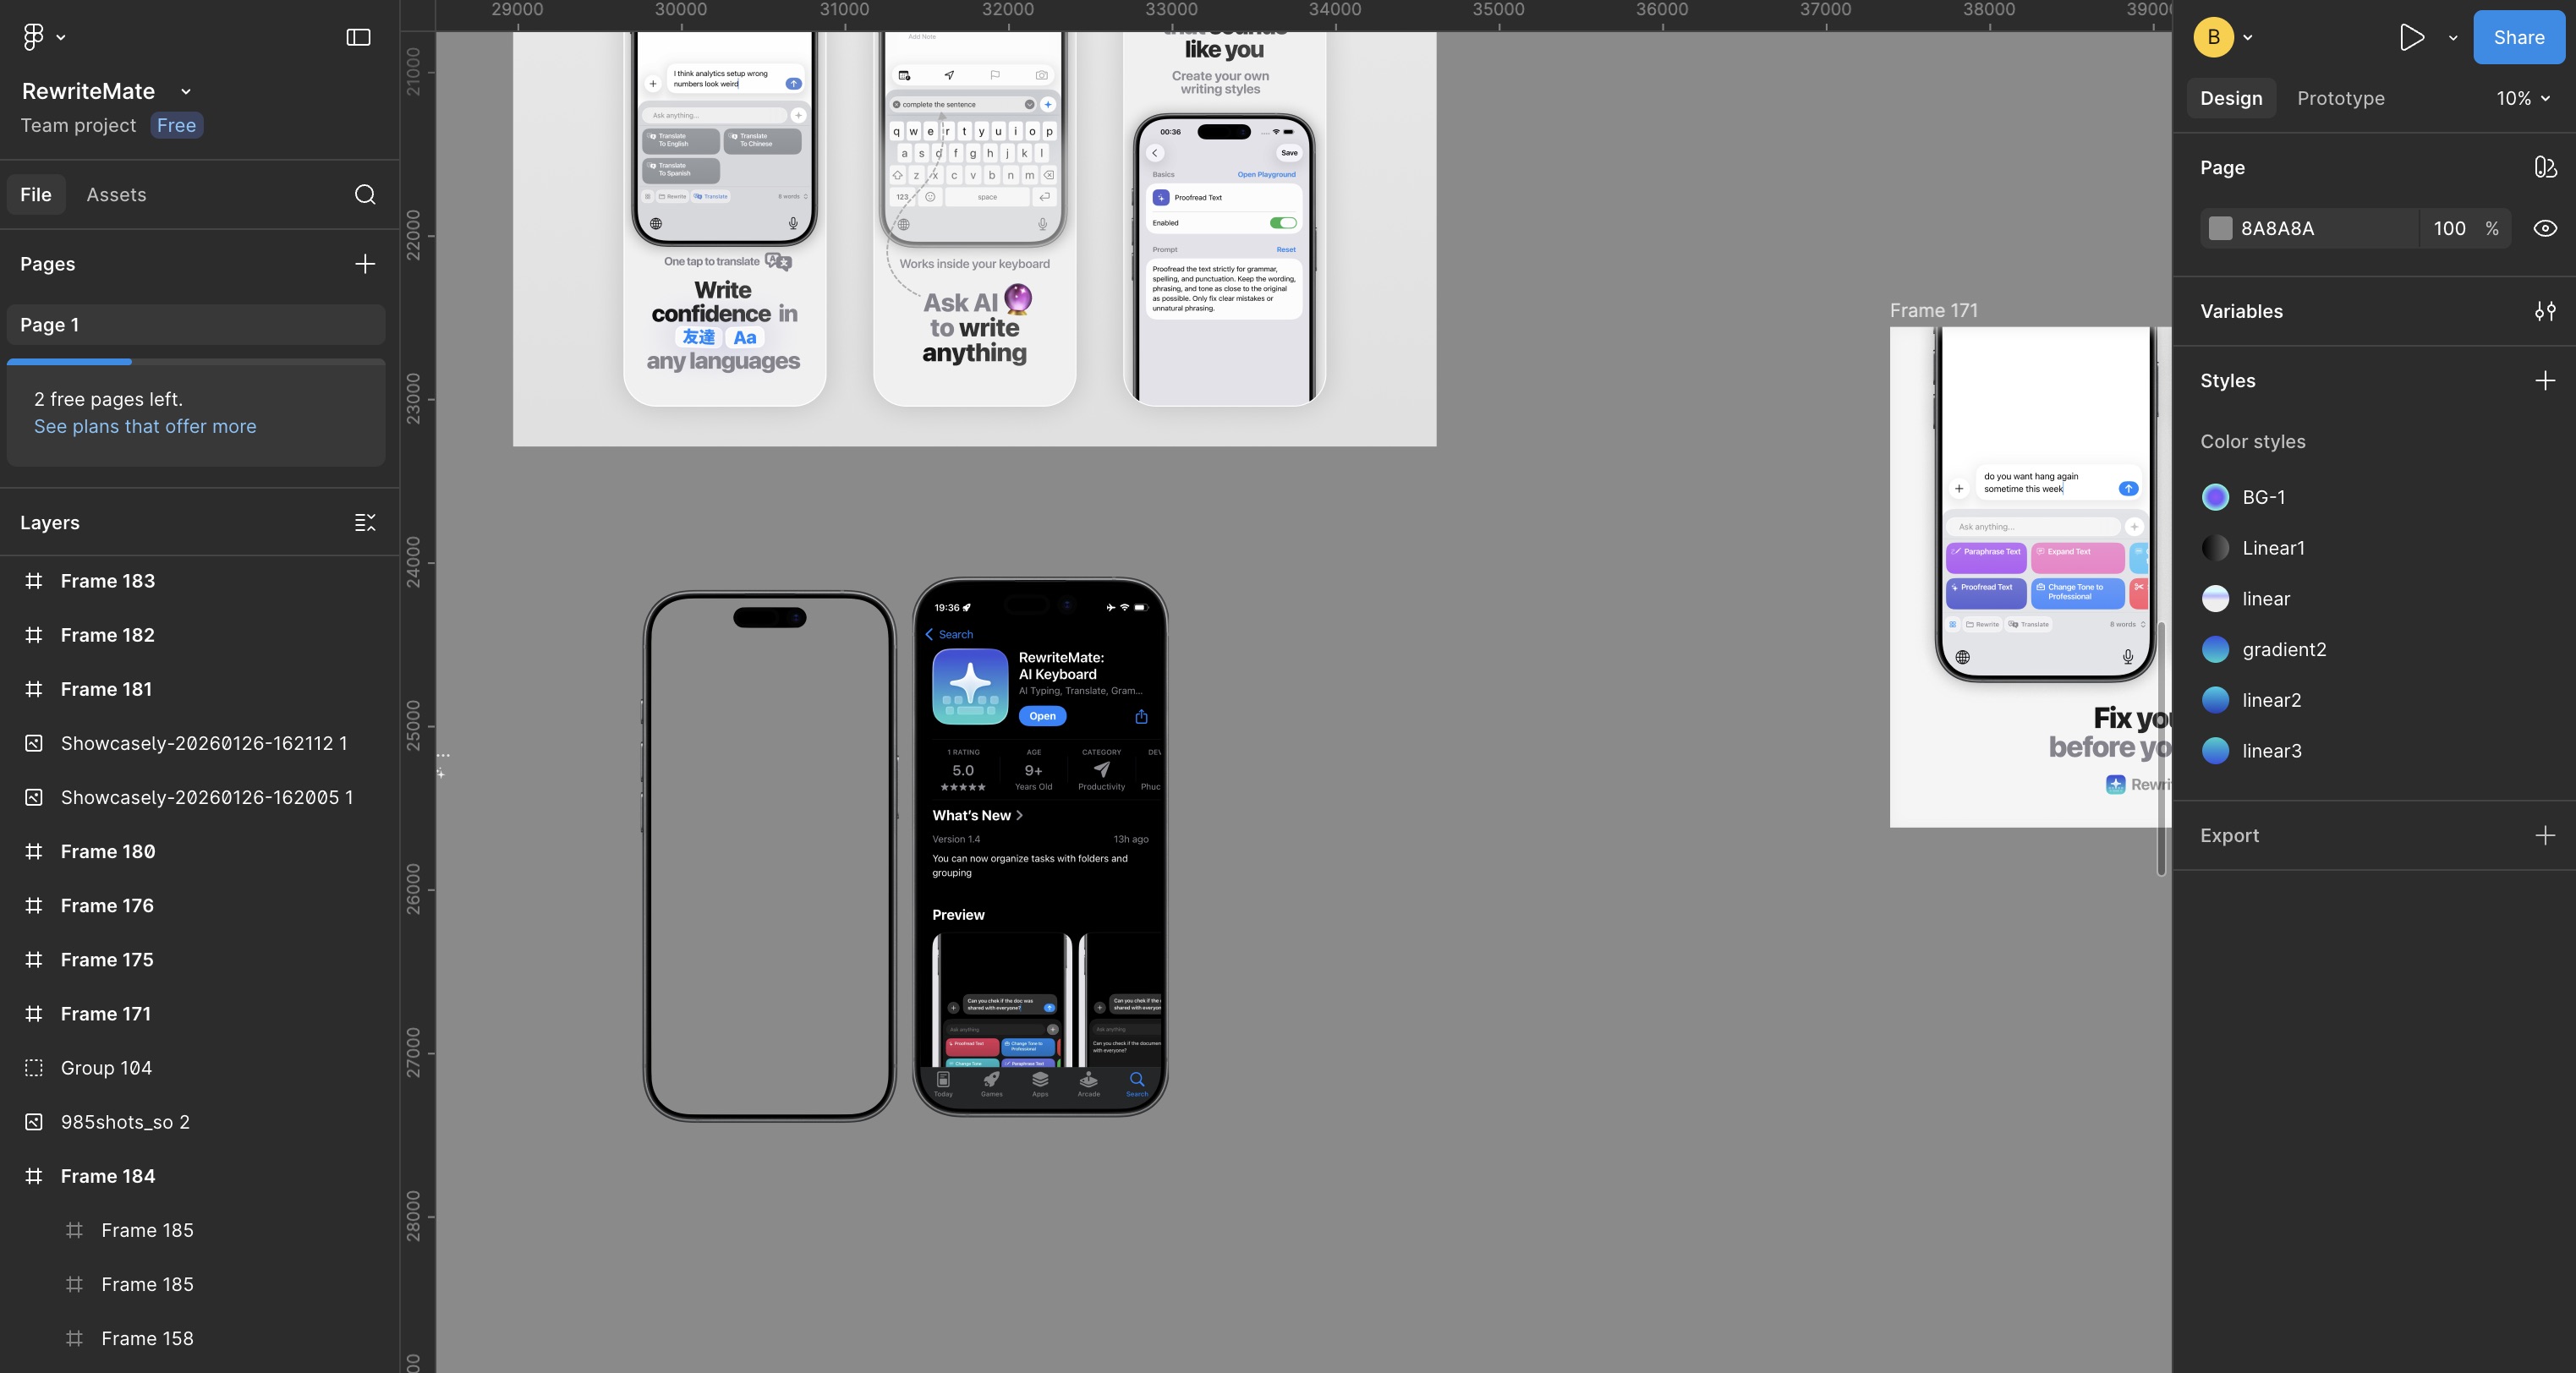
Method 2: Figma device frames (free, flexible, more manual work)
Figma has a solid library of iPhone device frames — both community-made and first-party. The workflow is: export your simulator screenshots, drop them into a Figma file with a device frame, add a background and caption, export. For developers who are already comfortable in Figma, this produces clean results.
The output looks more intentional than raw simulator exports. You can add context text, use a branded background color, and present multiple screens in a logical sequence. The limitation is time: each screenshot is a manual design exercise. If you want to update your screenshots for a new feature or a seasonal campaign, you're rebuilding the layout from scratch.
It also produces flat results — the device frames are 2D illustrations, not 3D renders. They look clean, but they lack the depth and realism that premium mockups deliver.
Best when: You have basic Figma skills, time to set up a template properly, and only need static screenshots without 3D depth.
Method 3: Browser-based mockup generators (easy, limited resolution)
Tools like Shots.so, AppMockUp, and PostSpark let you drag in a screenshot and export a framed mockup in under a minute. No design skills, no software to install — just a browser tab.

PostSpark is far more than a simple framing tool, it is a high-utility editor designed for the iterative needs of developers and marketing teams. Its standout strength lies in its technical versatility and support for high-stakes submissions. Shots.so produces visually clean output for static images.
The ceiling shows when you need more. Export resolution is limited on free tiers. There's no real 3D rendering — just flat device frames with a screenshot composited in. Video support is either absent or produces low-quality GIFs. And everything renders through a browser, which means no native Apple performance and no offline access. For a fast first pass or a social post, these tools are excellent. For a polished App Store presence that looks premium, they tend to feel like they're almost good enough. Best when: You need quick static screenshots at acceptable quality, especially for batch App Store sizing or fast social media posts.
Method 4: 3D native apps like Protato (fast, 4K, works on iPhone)
This is where the quality ceiling disappears.
Native 3D mockup tools render your screenshots or screen recordings inside physically accurate iPhone models — real lighting, real material depth, real reflections. The output looks like a professional studio produced it, because the rendering engine is operating the same way one would.
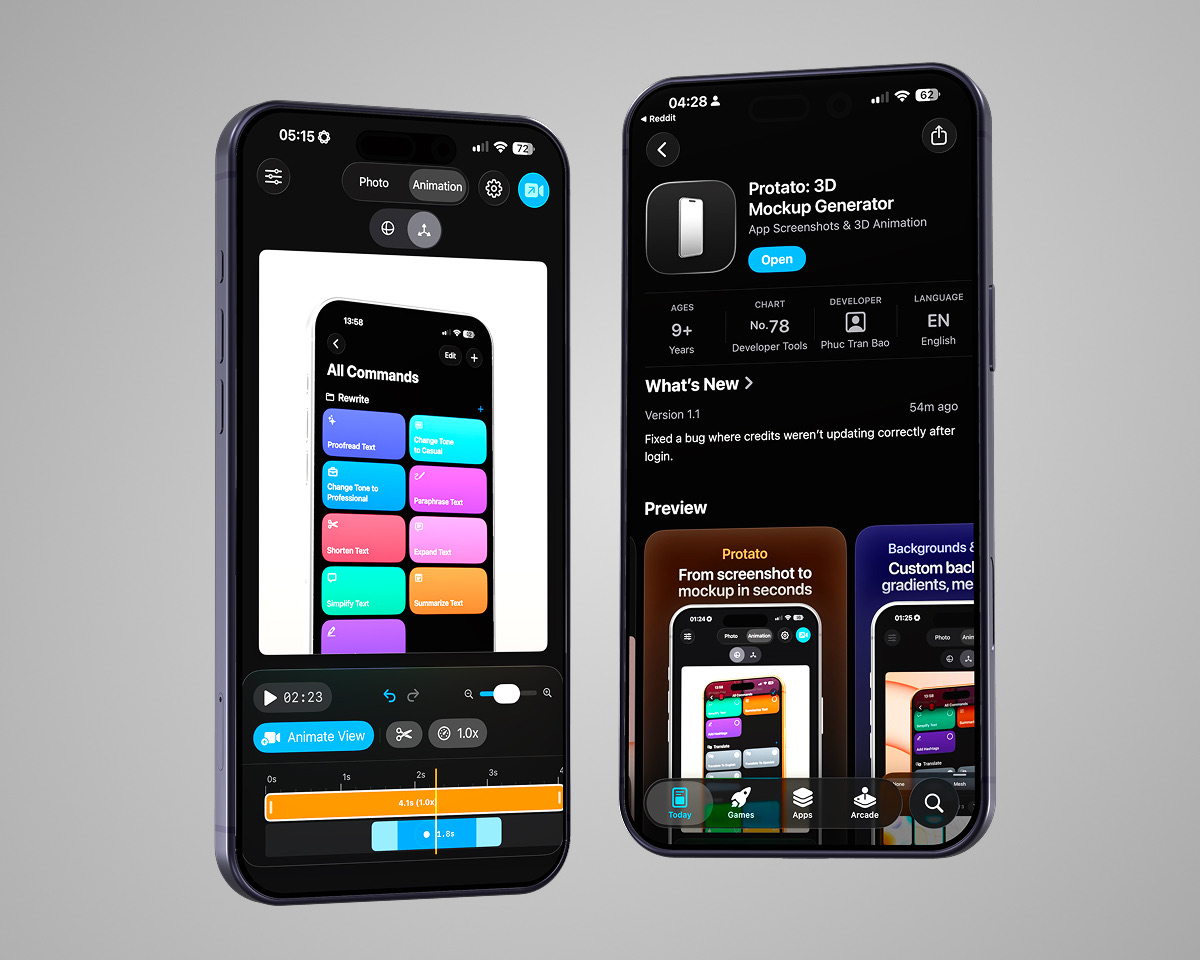 Protato is built specifically for this use case on Apple devices. It supports the current iPhone lineup (iPhone 15 Pro Max, 16 Plus, 17 Air, 17 Pro Max) with accurate colorways, and it runs natively on iPhone, iPad, and Mac with iCloud sync across all three. The workflow is:
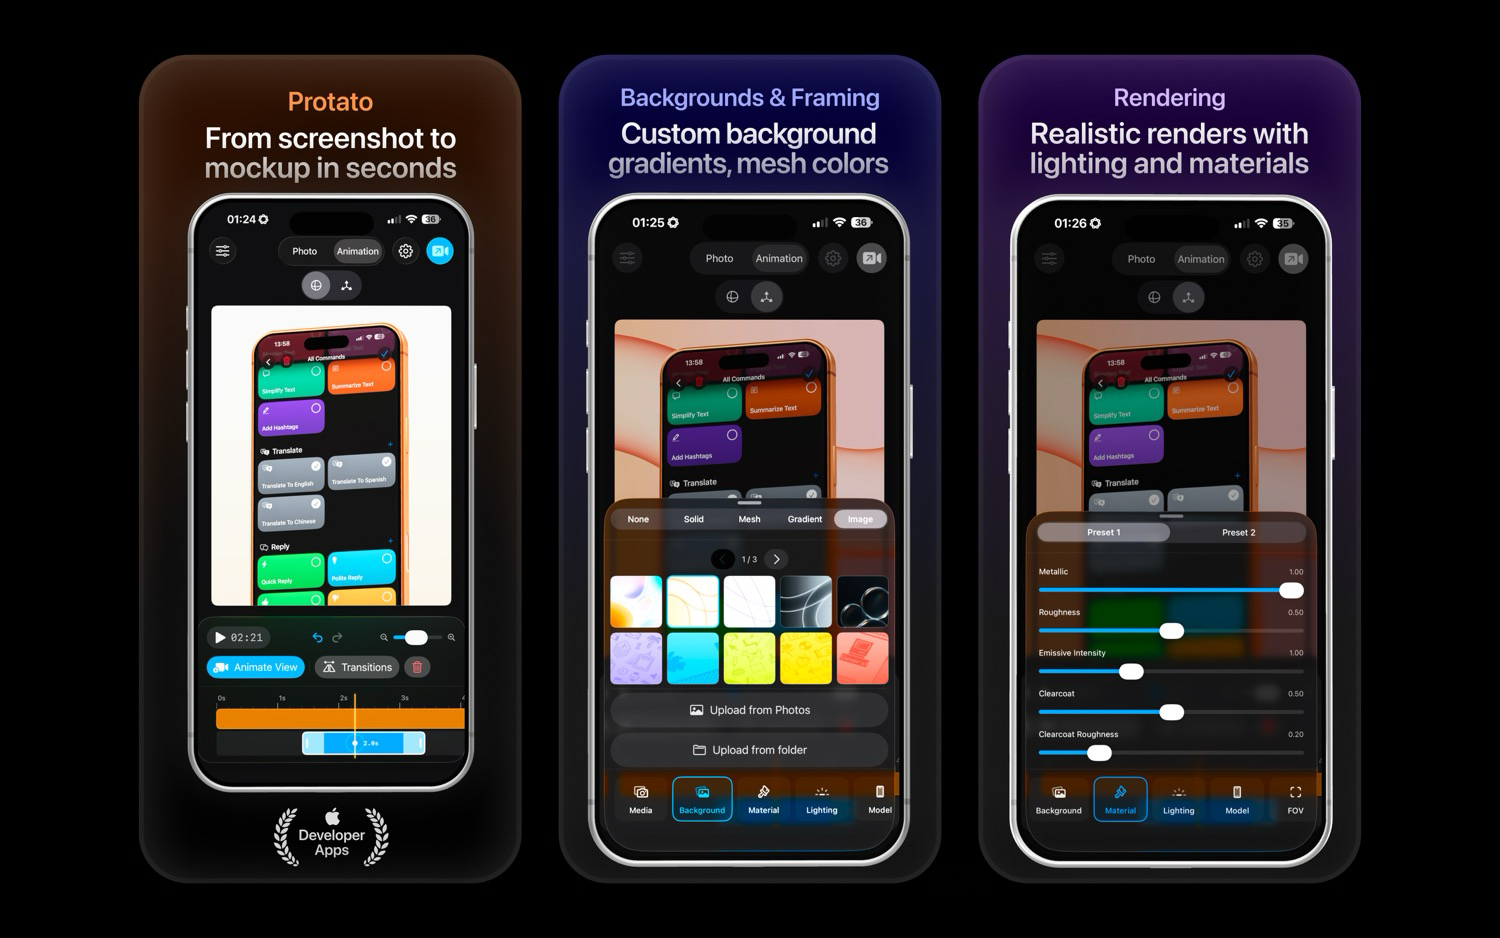
- Open Protato and choose your iPhone model
- Import your screenshot or screen recording from Photos or Files
- Pick a lighting preset — Studio for clean, Dramatic for cinematic, Flat for minimal
- Adjust the background (solid color, gradient, or transparent for layering)
- Export in 4K PNG or video
From open to export, under two minutes. For App Store screenshots specifically, the transparent background export is particularly useful — it lets you composite the rendered mockup onto any background in another tool, or submit it directly.
 The other advantage: you can do this from your iPhone. Not your Mac — your phone. Waiting for a build to finish, between meetings, on the train. A 4K App Store screenshot doesn't require a desk.
Best when: You want premium-quality 3D mockups fast, need 4K export, want animated video output, or need to work from your iPhone or iPad.
The other advantage: you can do this from your iPhone. Not your Mac — your phone. Waiting for a build to finish, between meetings, on the train. A 4K App Store screenshot doesn't require a desk.
Best when: You want premium-quality 3D mockups fast, need 4K export, want animated video output, or need to work from your iPhone or iPad.
Method 5: Hiring a freelancer (best quality ceiling, slowest option)
For complex scenes — lifestyle photography composites, elaborate multi-device layouts, or motion graphics that go beyond a rotating phone — a freelancer is still the right call. Platforms like Dribbble, Toptal, and Contra have designers who specialize in App Store creative.
The tradeoff is obvious: cost and speed. A good designer charges accordingly, turnaround is measured in days not minutes, and every revision is a conversation. For a major app launch with a real marketing budget, this makes sense. For an indie developer shipping updates every few weeks and iterating on creatives, it's not a sustainable workflow.
Best when: You have a marketing budget, a major version launch, and need something that goes beyond what any tool can automate.
The fastest path to professional App Store screenshots
If you're a solo developer who needs to ship polished visuals without a design background or a freelancer budget, the practical answer is Method 4. A native 3D tool like Protato gets you from screenshot to 4K export in under two minutes, on any Apple device, with results that hold up against apps with dedicated design teams. The App Store is competitive. Every pixel of your listing is a signal about the quality of what's inside. Flat simulator exports say "this developer ran out of time." A 3D lit mockup with a clean background says "this app is worth your attention."

Felix Tran
Indie Developer & Protato Editorial Lead
Write about everyday workflows. Especially around design, writing, and shipping ideas fast